Note: This blog article covers the classic Esri Story Maps which are in mature support and scheduled to be retired in late 2025. Story authors are strongly encouraged to use the new ArcGIS StoryMaps to create stories.
For more information about transitioning to the new StoryMaps, see ArcGIS StoryMaps resources. For more information about the transition from classic Esri Story Maps to the new ArcGIS StoryMaps, see Esri Story Maps: Now in mature support.

Map Tour is a very popular story map template often used to tell stories using photos and other images placed on a map. Map Tour supports the ability to use videos from a variety of sources. Here’s an overview of how you can add YouTube videos to your Story Map Tour.
Note: the ability to add a video to your Story Map Tour will not be available if you have chosen to upload your images to your ArcGIS account by clicking the ArcGIS button under I need to upload my images (highlighted in yellow below).
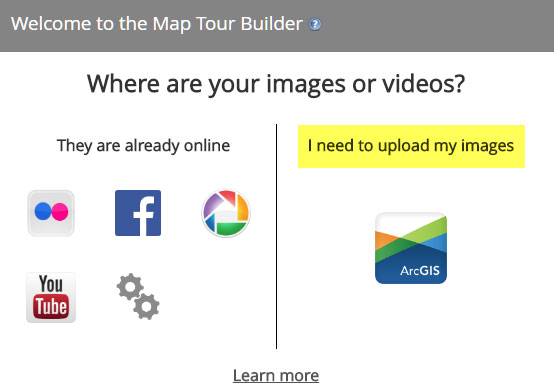
If you have a made a choice from options found under They are already online, then the video button will be available.
Step 1: Open an existing Map Tour in builder mode
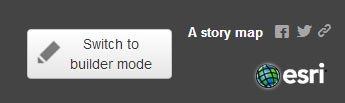
In this example we’ll add a video to an existing tour, a tour of the Esri Redlands campus. After opening the tour click Switch to builder mode found in the upper right of the application. Note that this is available only if you are the story map owner:
Step 2: Add the video as a new tour point
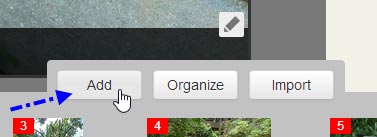
Once in builder mode, choose Add.
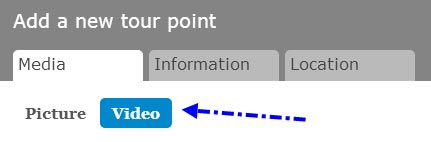
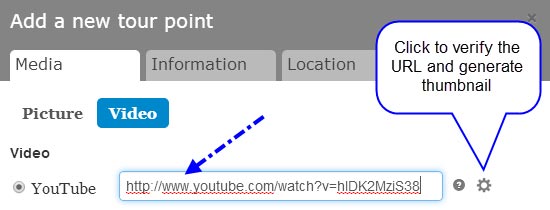
On the Media tab in the Add a new tour point options, choose Video:
In this example we’ll add an ArcGIS Overview video from YouTube. The required URL location will vary depending on where and how the image is stored. Hover over the tip (the question mark next to the video source) for help:

Once you have determined that you have the correct URL to the video source, copy and paste it into the source input. Then click the gear symbol to verify that you have provided the correct URL, and to generate a thumbnail:
You will see the check mark appear if the URL is correct:

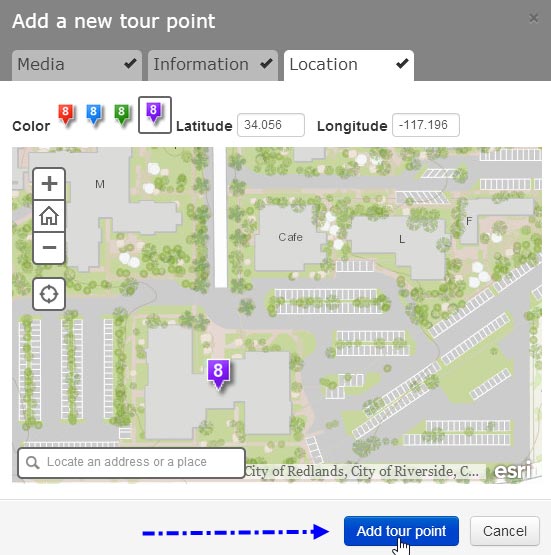
Add a name and caption for the video in the Information tab, and place the tour point on the map in the Location tab. You can change the color if you like to highlight where videos are on the tour. When finished, click Add tour point:
Step 3: Make any additional changes and save your tour
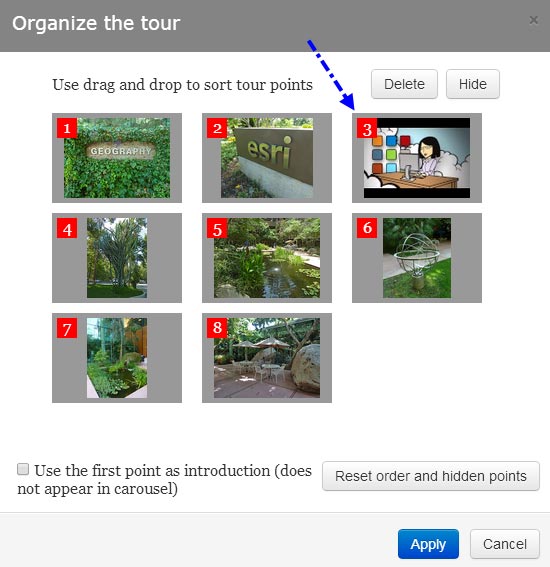
You can change the location of the video on your tour, and make other changes as desired. Below we’ve clicked Organize and dragged and dropped the video to place it at the third stop on our tour:
When finished save your map tour.
Step 4: View your map tour
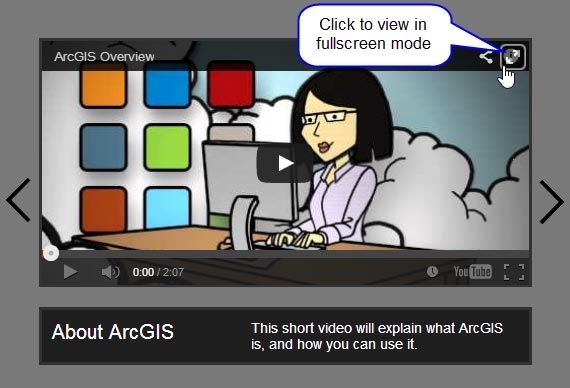
You’ve now successfully added a video to your map tour. You can open the tour and play the video when the newly added tour stop is reached. You can play the video in the panel, or click to view the video in fullscreen mode:
For best results when adding videos to your Story Map Tour, use the default three-panel layout. Using that layout the caption entered for the video is displayed underneath the video. Using the integrated layout, the caption will partially overlap the video.
For more information
For more information see
This post was originally published on August 12, 2015, and has been updated.


Commenting is not enabled for this article.